


Technologies HearthssGaming - Pioneering the Future of Interactive Entertainment
The gaming industry has radically transformed over the past few decades, evolving from simple pixelated games to immersive virtual realities. At the forefront of this evolution is HearthssGaming, a platform
Techiadd.com - Latest Tech News and Reviews
Techiadd.com welcomes you with an easy-to-navigate site that covers the latest news and reviews on technology. The website’s goal is to provide clear, accurate, and up-to-date information that can help

Merc LTFS - Its Features, Benefits, and Uses
Merc LTFS is a financial technology solution designed to help businesses and investors manage their money more efficiently. It plays a key role in liquidity management, ensuring that companies always

Which of the following are accountabilities in the scrum framework?
Scrum is an Agile framework that helps teams develop and deliver products through iterative cycles,

Techiadd.com - Latest Tech News and Reviews
Techiadd.com welcomes you with an easy-to-navigate site that covers the latest news and reviews on
Top 10 Notion Alternatives to Streamline Your Workflow
Notion has become a popular choice for many users looking

Mellow Flow App Review: Is it Worth the Cost?
We all know the struggle of staying productive, especially when

Motion App Review: Can It Help Manage ADHD?
Are you finding it hard to manage your tasks and

How does ChatGPT make money?
Artificial intelligence is rapidly changing industries, and OpenAI, the creator of ChatGPT, is at the forefront

How to Sell AI Art in 2024? | 10 Best Platforms to Sell AI Art Rapidly
Have you ever imagined turning your AI-generated art into a steady income? In 2024, the

How to Use AI in Software Testing: A Quick Guide
What if software testing could anticipate bugs before they occurred, streamline repetitive tasks, and speed

How to Sell AI Art in 2024? | 10 Best Platforms to Sell AI Art Rapidly
Have you ever imagined turning your AI-generated art into a steady income? In 2024, the
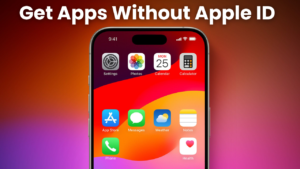
How to Get Apps Without an Apple ID: Simple Methods
Normally, you need an Apple ID to download apps from the App Store. An Apple

Best Story Games of All Time - Unforgettable Narratives in Gaming
Video games are more than just a form of entertainment; they are a powerful medium


Create Your Own Uber Clone in Brazil
Want to launch a sustainable Brazilian taxi-hailing app like Uber? You’ve come to the right
Which of the following are accountabilities in the scrum framework?
Scrum is an Agile framework that helps teams develop and deliver products through iterative cycles,

OST to PST Converter - Why You Need It and How It Works
Microsoft Outlook stores emails, contacts, and other data in two types of files: OST (Offline